| |
||
Overview
The ProblemUnder certain circumstances and when using the windshield wipers at maximum speed, I could hear a noise just as if the wiper arms hit something everytime they did a sweep. After a quick investigation it was verified that both the engine hood and the right wiper arm did carry marks after repeatedly contact. 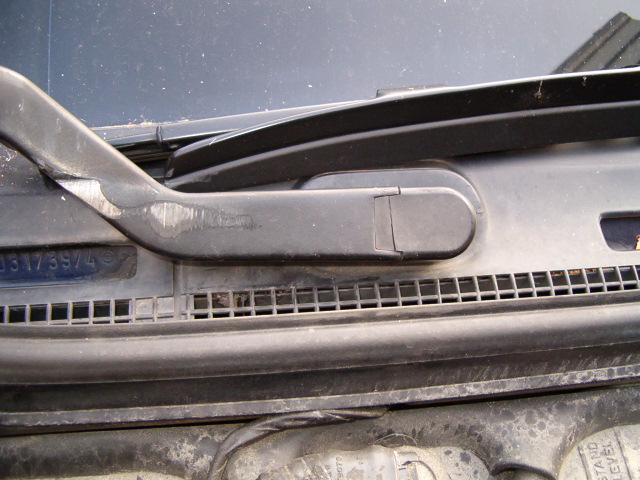 Marks on the right wiper arm after repeatedly contact with the engine hood. After a more thorough investigation, it was obvious that the shaft to the right windshield wiper arm was faulty and showed a large play. Furthermore the splines (both on the shaft and inside the wiper arms) were worn out on both side. The need for a new windhshield wiper arm console and two new wiper arms were obvious. This specific type of wear damage is not uncommon on the E34 series.  The excessive play of the right spline shaft. Tools, Skills And PartsThe job is pretty straightforward and does not include any special tools nor any new parts or fluids. However it can be quite time consuming due to the location of the windshield wiper console. Quite a lot of other parts have to be removed until you can poke it out. But having plenty of time and by working methodicallay it will be no problems. Difficulty Level
The following tools are required for this particular work.
The following spare parts are required for this particular work. Note that they are intended for a BMW 535i E34 -89 (which has a pressure adjusting device on the left wiper arm).
Before Starting The Repair JobPlease follow the two recommendations given below. They are copied straight from the Bentley BMW 5-Series Service Manual [1].
The wiper arms should be in the parked position before removing the wiper console. To avoid damaging the wiper arms and pivots, do not manually slide or force the wiper arm across the windshield. Before beginning the procedure, set the air ventilation flaps in the closed position. If necessary turn the ignition key on and off with the air control/volume lever in the off position to operate the flap motor. Removing Wiper ArmsThe first step will be to remove the wiper arms. Start to carefully pry off the plastic covers using a 3.5 mm flat-blade screwdriver (or similar) on both wiper arms. For the right wiper arm, remove the nut using a 13 mm box-end wrench. Don't forget to remove the washer found under the nut. For the left wiper arm, loosen the clamping screw (the horizontal one) using a 5 mm Allen key. Now, carefully lift the wiper arms straight up. If they are stuck, add some CRC 5-56 or similar and try again. Another tips is to use two large flat head screwdrivers, one on each side of the wiper arm at the shaft, then carefully push up the wiper arm. 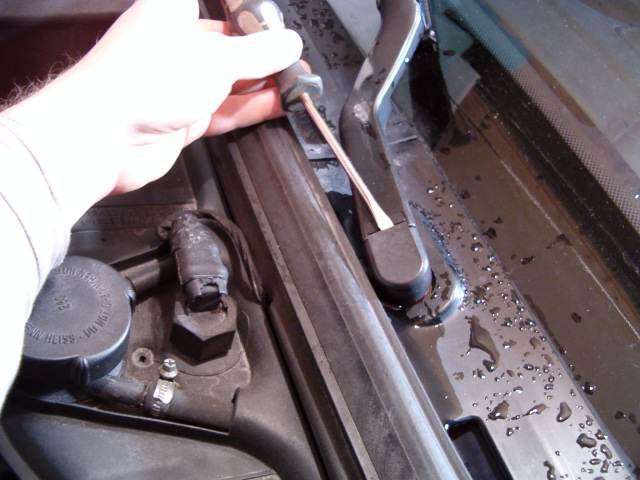 Removing the plastic cover from the right wiper arm. 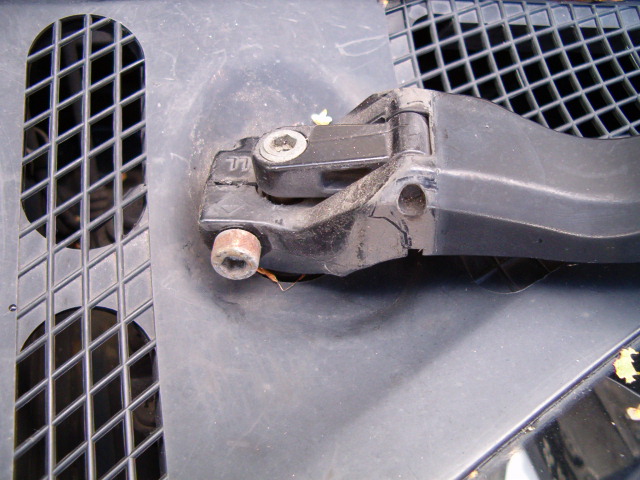 Left wiper arm with the clamping screw (the horizontal) and the adjusting screw (the vertical) visible. The car used as an example for this reparation (a BMW 535i E34 from 1989) is equipped with a driver's side wiper pressure control system (called ADV by BMW). This system electronically regulates the wiper contact force on the windshield. If your car is equipped with ADV then your left wiper arm has the same mounting layout as seen in the pictures. If not, it will simply have the same mounting layout as the right wiper arm, i.e. a 13 mm nut. Relocate Coolant Expansion TankThe coolant expansion tank must be moved aside in order to get access to the area where the heater blower motor (and behind that the windshield wiper console). Start by disconnecting the contact to the coolant level sensor. 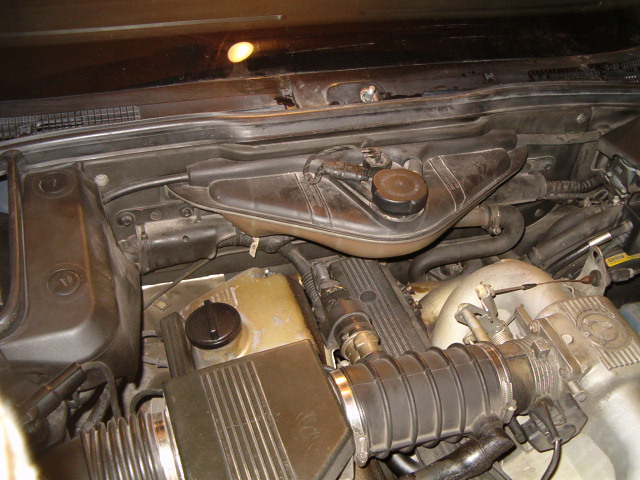 Overview of the working area. 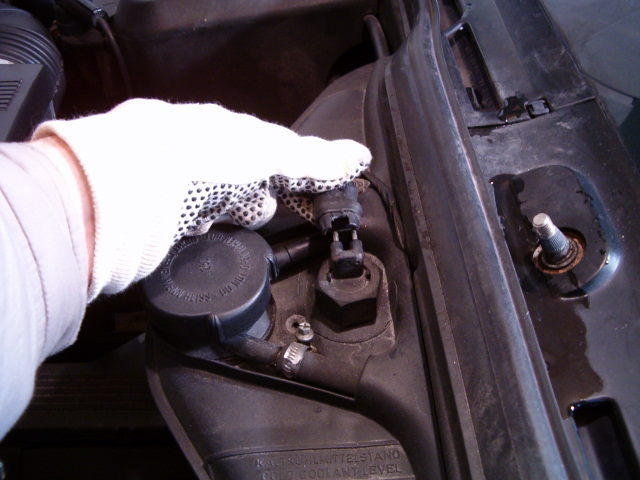 Disconnecting the contact to the coolant level sensor. |
The coolant expansion tank is fastened with two plastic hex head nuts, one at each side of the tank. Use a 10 mm socket, socket extension bar and a ratchet wrench or similar to remove them. 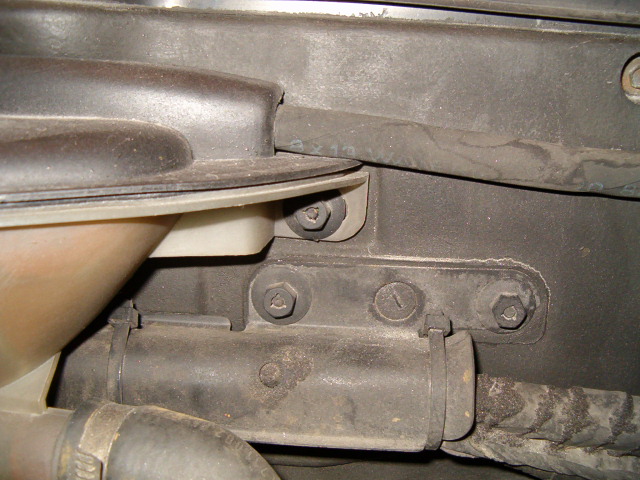 Left side of the coolant expansion tank. 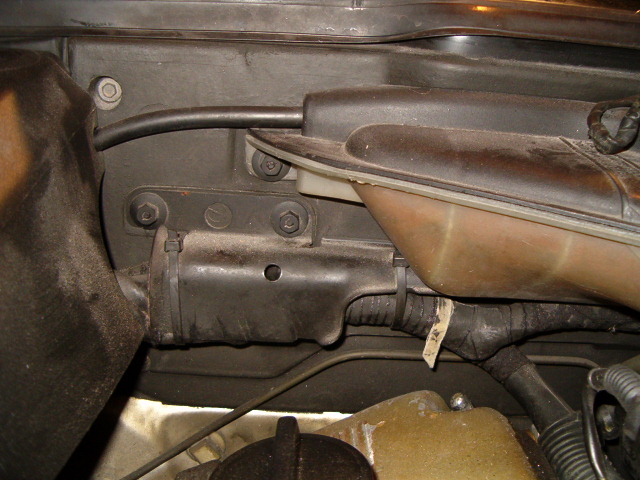 Right side of the coolant expansion tank. To be able to move around the coolant expansion tank, the hose for overflow has to be removed from it's mounting point. The hose is mounted at a plastic clip a bit down on the right side of the rear engine compartment. Start by removing the plastic cover held by two flat plastic screws on the right side of the rear engine compartment. Use a 8 mm flat-blade screwdriver or similar. (This plastic cover has to be removed anyway in a later stage when the bulkhead splash shield shall be removed). 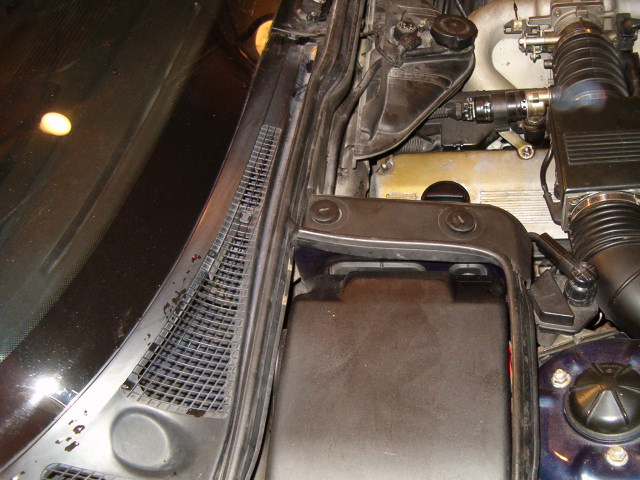 The plastic cover held by two straight plastic screws. Now the mounting of the hose is visible if you look straight down from where the plastic cover once was. Disconnect the hose from the plastic clip in order to be able to relocate the coolant expansion tank. 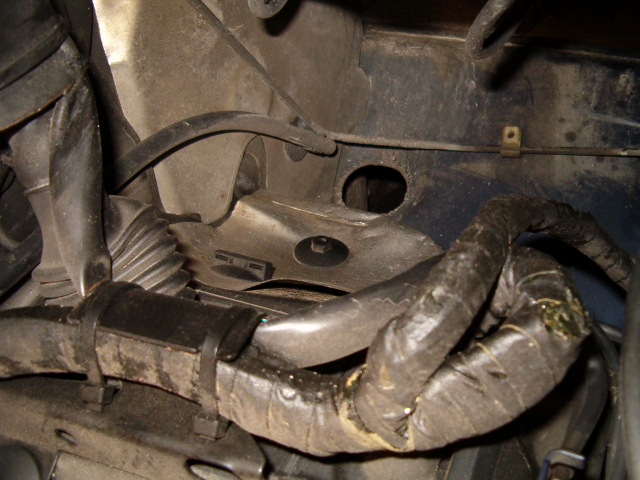 The overflow coolant hose still attached to the plastic clips. Now you should be able to move the coolant expansion tank freely (relatively). However be careful not to stress, bend or abuse the connections and hoses which is still attached to the coolant expansion tank. In most situations during this repair job, the coolant expansion tank is out of the way most of the time when it has been tilted 90 degress and moved to one side. See the pictures below for examples. 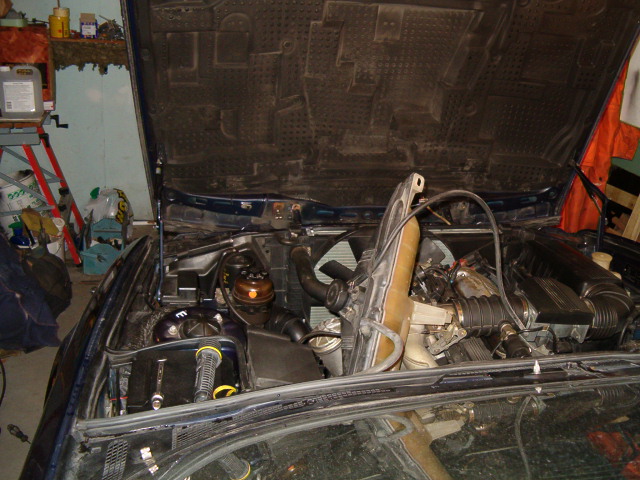 Example of how to place the coolant expansion tank.  Example of how to place the coolant expansion tank. Removing Cable ShieldNext step is to remove the metal shield which covers the large collection of cables behind. The large cable collection is tightly mounted together with the metal shield by five plastic straps (not reusable). The metal shield itself is then mounted with two 10 mm plastic hex head nuts at each side. The picture below will show these parts and where they are located. 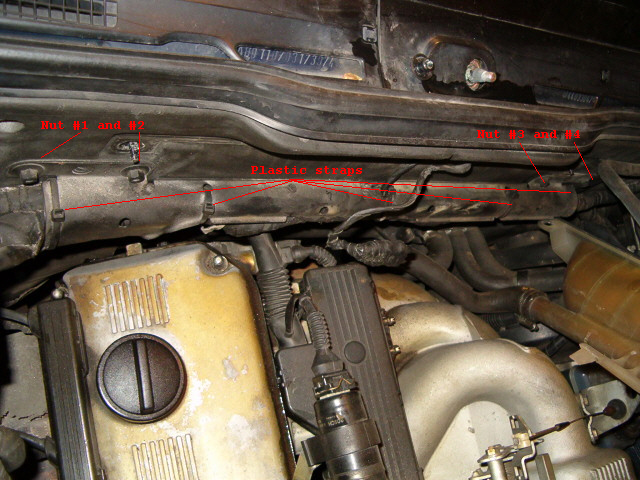 The cable metal shield together with the five plastic straps and the four 10 mm plastic hex head nuts holding the cable metal shield. Start by cutting all five plastic straps holding the cable bundle together with the metal shield. Don't try to remove them completely, just cut or bend them at various places. Since they probably have been around in the engine compartment for at least 10 years, they will not be very flexible and are fragile and will crack whenever you bend them. Utilize this and remove as much of the plastic bundles you can in an easy way. The rest will fall off when you remove the metal shield. 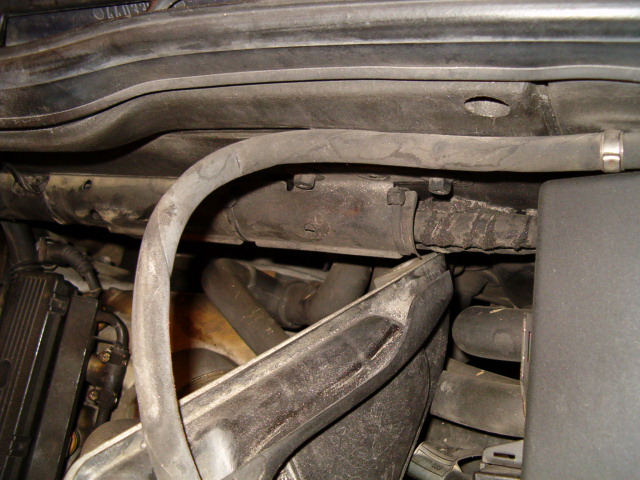 Left side of the cable metal shield with two plastic straps shown. 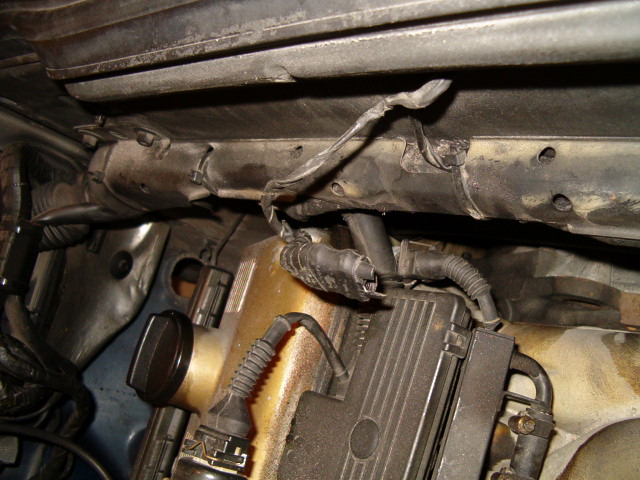 Right side of the cable metal shield with three plastic straps shown. |