| |
||
Overview
The ProblemThe fuel filter shall be replaced at every Inspection II Service. This repair instruction is written for a E34 535i but is applicable for all E34 models with the 540i as the exception which has a dual fuel filter construction. Tools, Skills And PartsThe job is very easy to perform and does not require any kind of special tools. Difficulty Level
The following tools are required for this particular work (tools marked with green checkmark are optional).
The following spare parts are required for this particular work (parts marked with green checkmark are optional). Note that the BMW internal numbers are intended for a BMW 535i E34 -89.
Removing Old Fuel FilterBefore starting I would like to point out some important safety notes since it is the fuel system we are about to do repairs on.
Start by depressurizing the fuel system to avoid fuel being sprayed all over the place when you disconnect the fuel hoses later on. This is easily done by first removing the fuel pump relay and start the engine and let it run until it stalls completely. You will find the fuel pump relay in the so called E-box which is the elctronic box on the right side of the car just behind the fronst strut tower. See the picture for the exact location (can differ on other models than the 535i though). 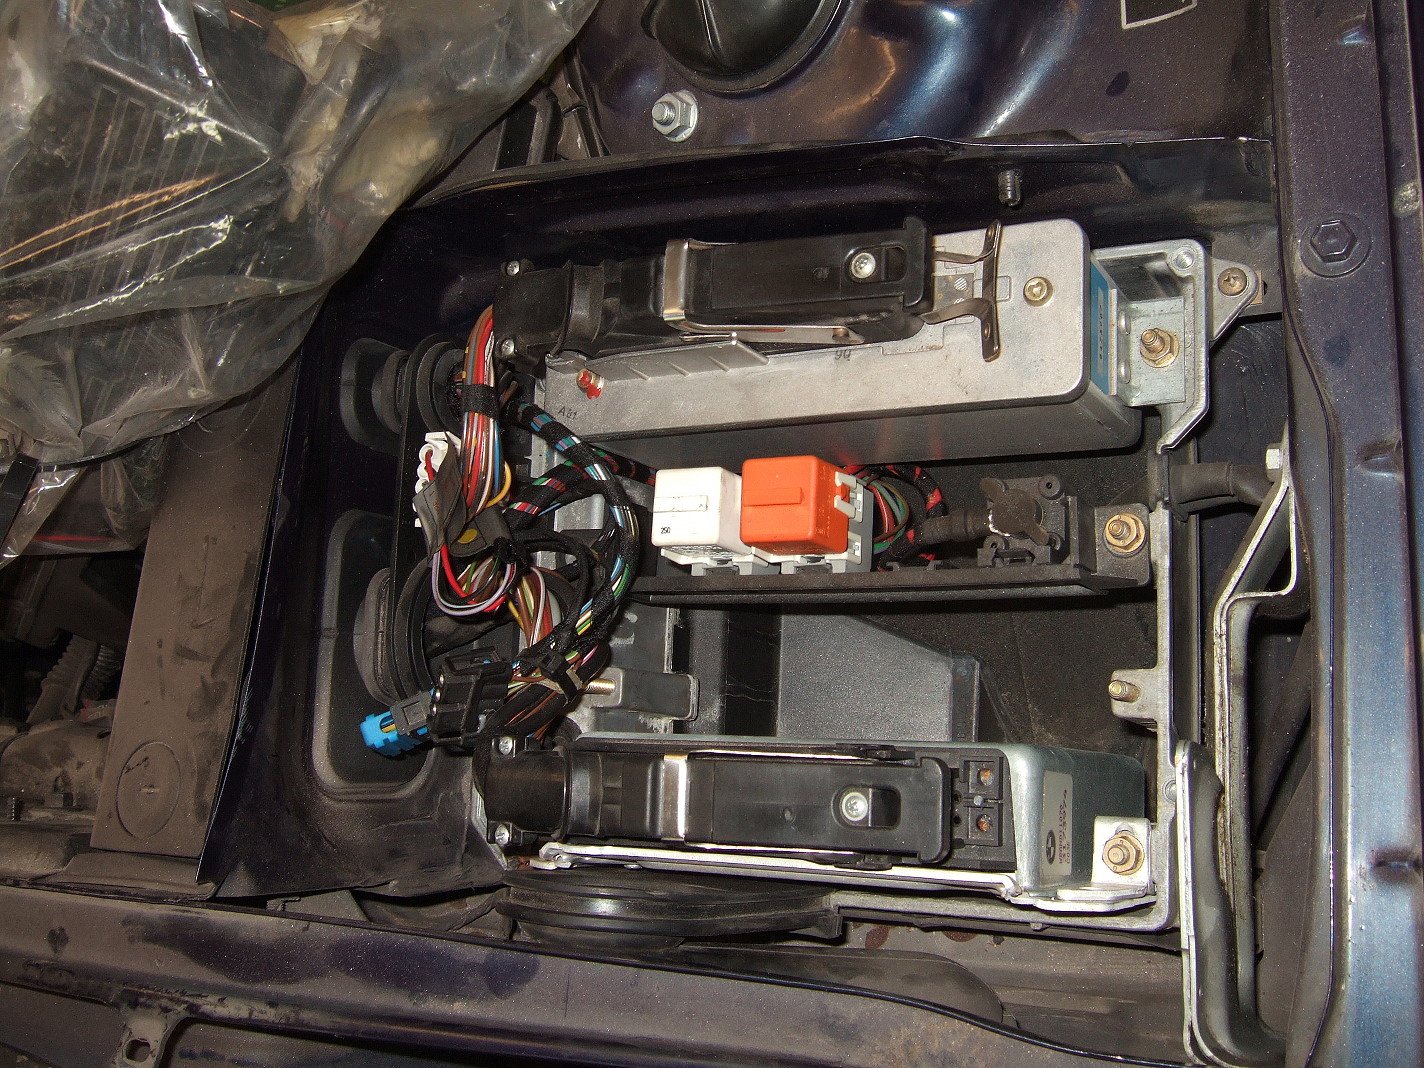 Picture 1 : The location of the fuel pump relay in the electronic box. The fuel filter itself is located just behind the right rear wheel drive axle. It is held in place by the circular fuel bracket which in turn is attached to a chassis bracket with a 10 mm hex head screw. Start by jacking up the car (and always place a jack stand - never never rely on a floor jack alone) and remove the right rear wheel for better access. 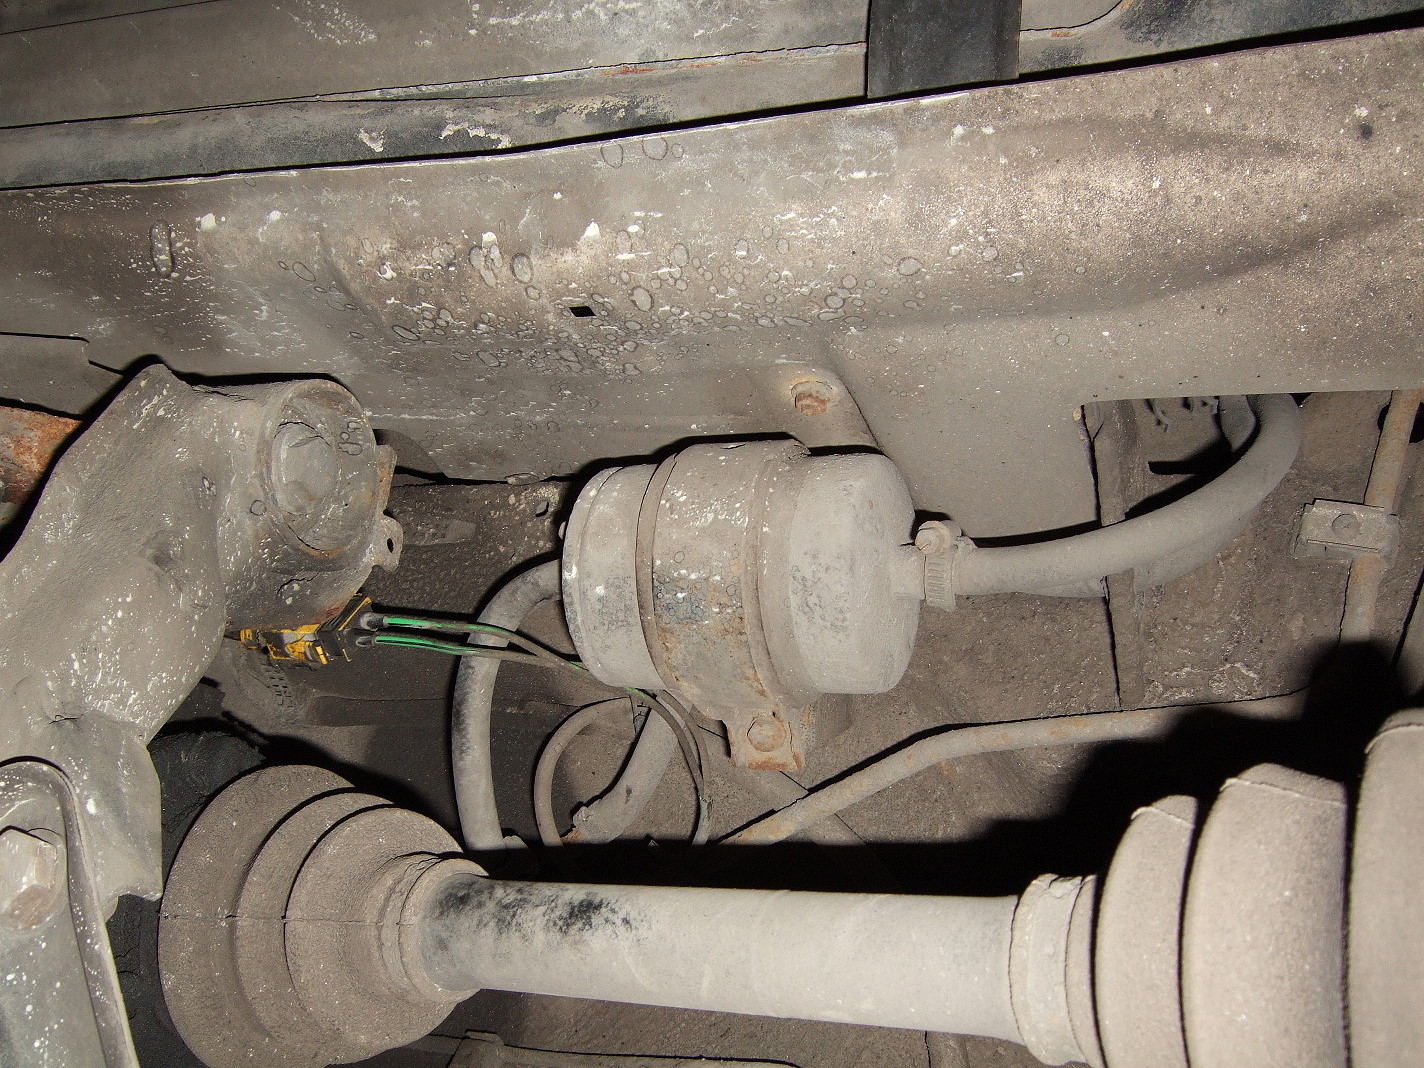 Picture 2 : The fuel filter is located just behind the right rear wheel drive axle. Hose clamps at the red arrows and the bracket screw at the blue arrows. Spray liberately with a rust dissolver such as WD-40 or CRC MoS2 Penetrating Oil over the chassis bracket screw. Give it a couple of hours to work (you have to give the spray some time to work). Undo the two hose clamps (in my case with a 7 mm socket) and also undo the 10 mm hex head chassis bracket screw. Now disconnect one of the two fuel hoses and tilt the fuel filter and pour out as much fuel as you can out of the fuel filter. Then disconnect the second fuel hose. Repairing & Refurbishing BracketsA note regarding the chassis bracket screw - it is screwed into a welded nut at the back of the chassis bracket. However don't be surprised if that very rusty screw snaps when trying to undo it - even if you applied some kind of rust dissolver. This happened to me but it's quite easy to fix. Start by cutting off the rest of the screw with a small cutting wheel on a Dremel tool so it's more or less flat against the chassis bracket. Take a 2.0 mm drill and drill right through the screw followed by a 6.5 mm drill. The last step is to clean and slightly enlarge the hole. This is easily done with a Dremel tool and a cylindrical grinding stone. Now a M6 screw should fit perfectly through the hole. Since we destroyed that welded nut the fuel bracket is now attached to the chassis bracket using an ordinary M6x20 screw and a 6.4x12 washer, then comes the brackets, then at the end you secure with a 6.4x18 washer, a M6 nut and some strong threadlocker such as Loctite 270. 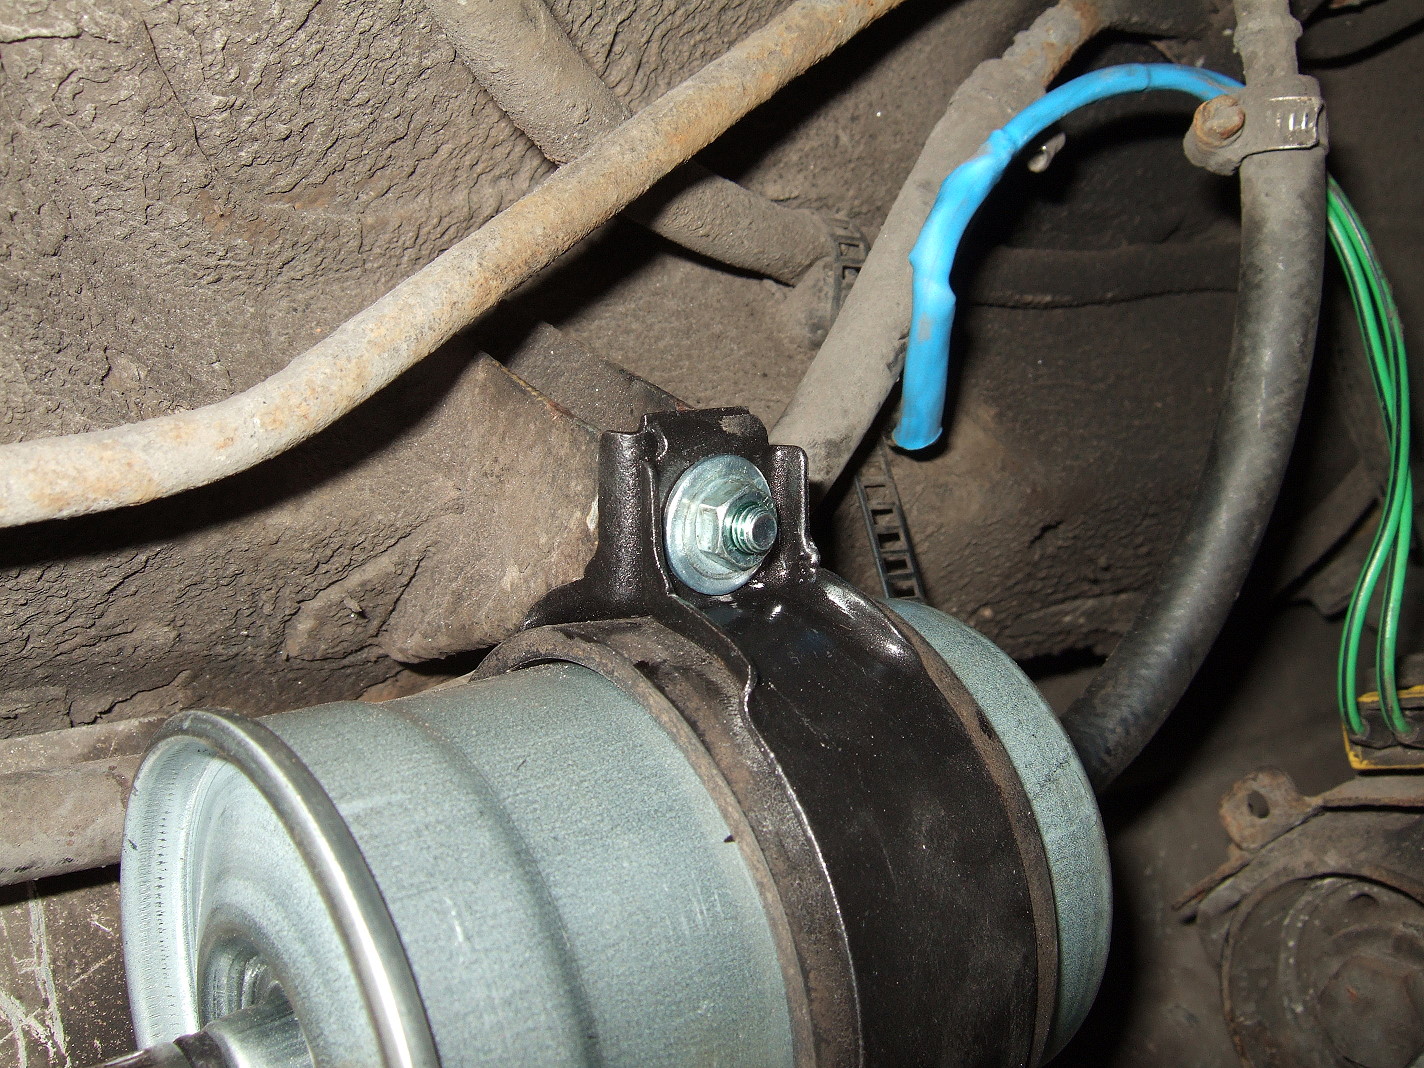 Picture 3 : A close-up of the new fasteners holding the fuel filter in place. Since I had a small blasting cabinet I thought I could try it out on the fuel bracket. Not necessary at all but I couldn't resist it. Below is a picture of how the fuel bracket was transformed from a dirty and rusty piece into looking like new. I used ordinary fine grit blasting sand and sprayed it with Hammerite Hammarlack Black paint. |
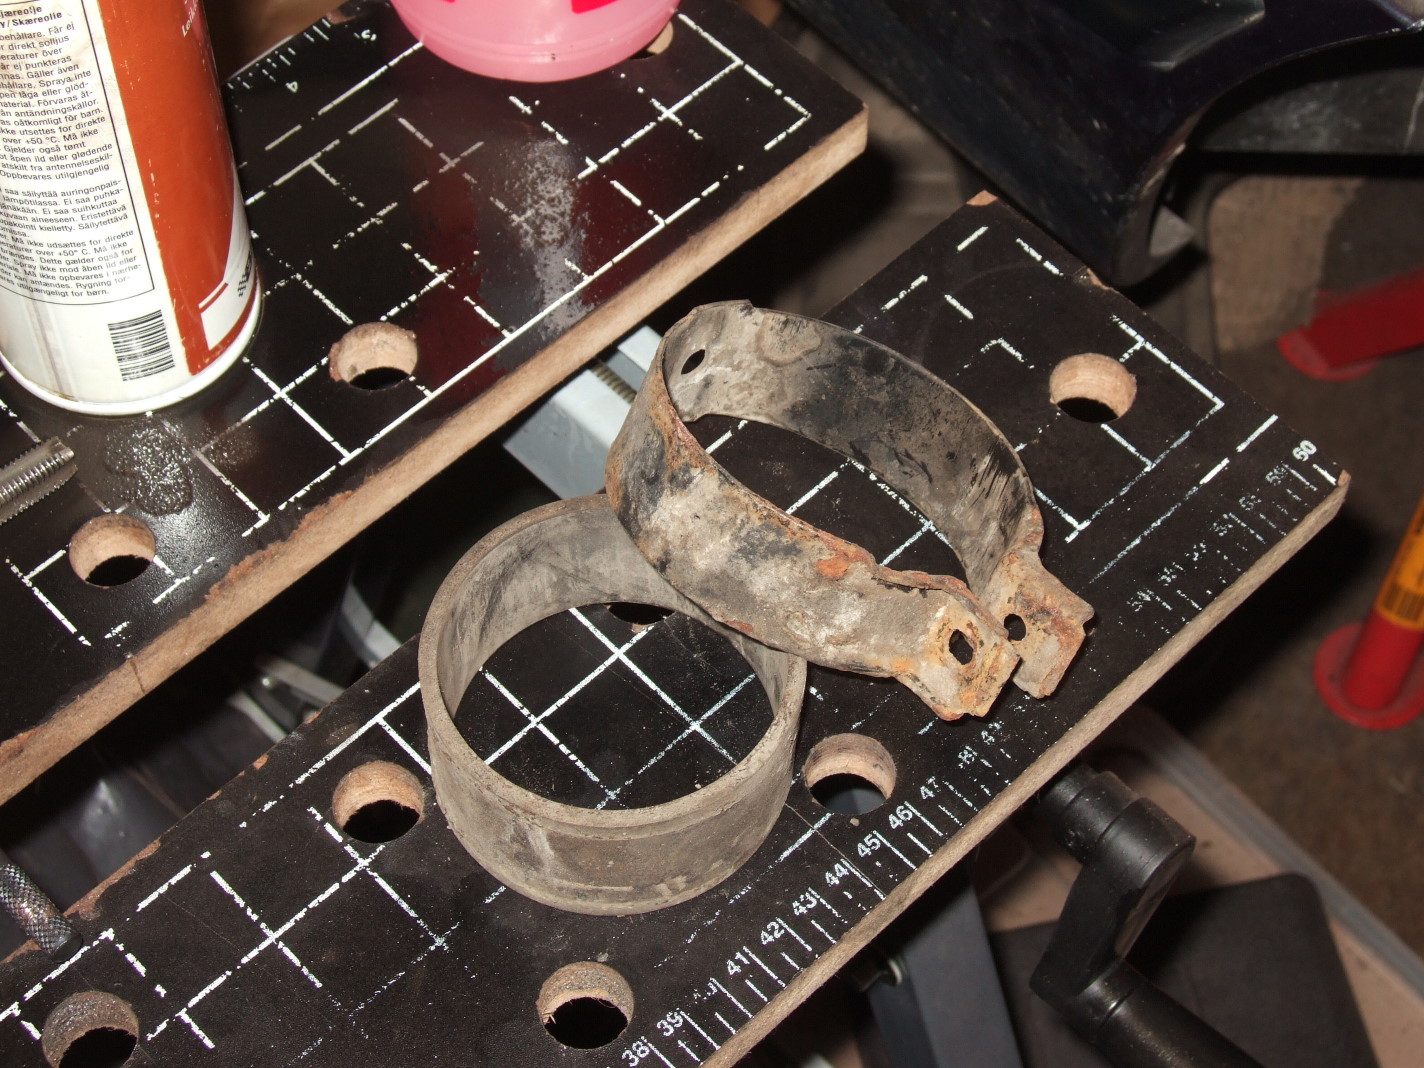 Picture 4 : The fuel bracket before any refurbishing made - it's rusty and dirty.  Picture 5 : The fuel bracket after it has been sand blasted. 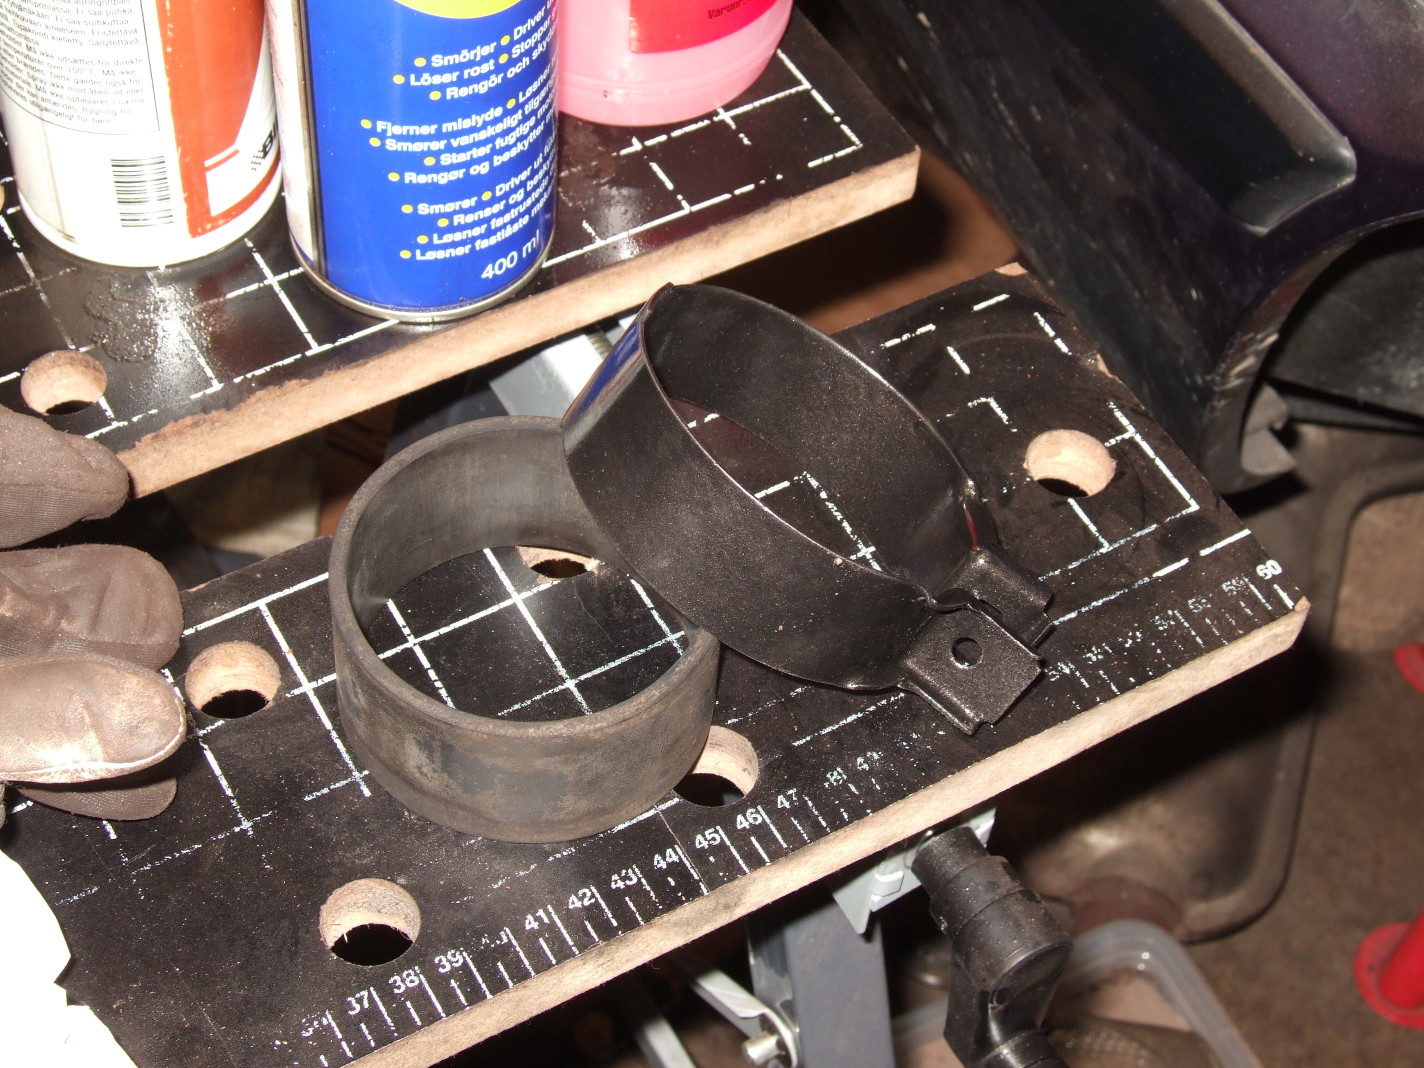 Picture 6 : The fuel bracket after it has been sprayed with two layers of Hammerite Hammarlack Black paint. Installing New Fuel FilterTime to install the new fuel filter. Pay attention to the arrows on the fuel filter. It must be installed in the correct way. And don't just look at the shape of your old and your new fuel filter because it differs between the manufacturers. Take my old and new fuel filter for example in the picture below. The old one was a Mann WK 830 and the new was a Vaico 20-0387 and they looked similar but had different flow directions.  Picture 7 : Old and new fuel filter (note the different flow direction between the Mann and Vaico fuel filter). And don't trust that the previous installation was correct! I made that mistake! My old fuel filter was installed in the wrong direction! So always look at the directions of the arrows on the fuel filter and install it according to Picture 8. There is a simple rule on the 535i E34, the fuel filter arrows shall always points inwards towards the differential! Picture 8 : Correct flow of a fuel filter (inwards and towards the differential). Clean the fuel hoses before fitting the new fuel filter. Start by loosely install the fuel filter and the fuel bracket and attach both fuel hoses. Make sure the fuel hoses are pushed all the way onto the connection pipe and then tighten the hose clamps. 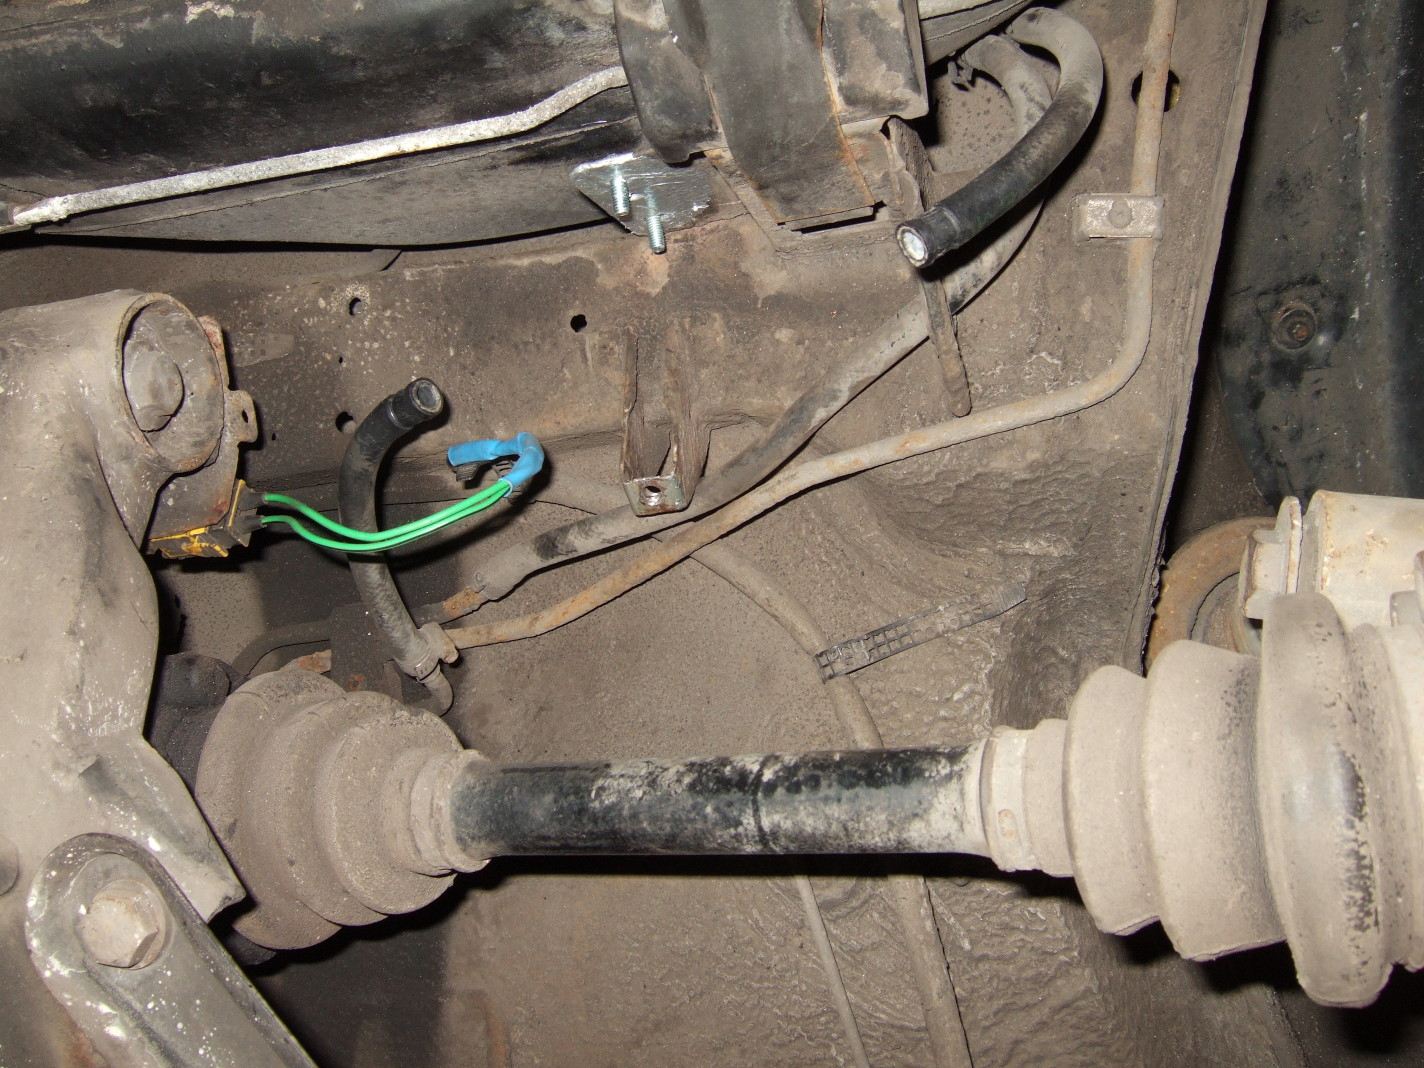 Picture 9 : The fuel hoses cleaned and everything ready to install the new fuel filter (note that the fuel hose is on the wrong side of the chassis bracket - it was located in such a way during the drilling and grinding operations to avoid damaging it). Throw away your old rusty hose clamps and use new in stainless steel (to avoid the old rusty ones to wear and tear on the fuel hoses unnecessarily). Finally locate the fuel filter and fuel bracket into correct position and tighten the bracket screw. In my case I've replaced it with a screw and nut combination instead.  Tightening Torques
|